
Tools and preparation
Clean handling matters when preparing a pheasant for food. Before the bird is handled, arrange a washable work area and the basic tools so each item is within reach. Keep the bird, feathers and other waste separate from food that will be eaten without further cooking. A clear setup makes the preparation process easier to manage.
Set up a clean work area
Choose a washable, uncluttered surface with enough room to place the bird and work without balancing items at the edge. Set up the area before handling the pheasant.
- Wipe the worktop clean and leave only the items needed for the task, making it easier to see the bird and keep the working space orderly.
- Place a clean container for the pheasant on the work surface, with enough room to hold the bird without crowding other items.
- Set a separate receptacle beside the work area for feathers and other waste, rather than piling discarded material beside the bird.
- Keep raw game and its work area apart from ready-to-eat food, including bread, salad and cooked dishes prepared for the same meal.
- Arrange the bird, waste receptacle and clean container so that discarded feathers cannot fall into the container or onto food preparation areas.
Keep the clean container reserved for the bird, not feathers or waste. If ready-to-eat food is nearby, move it away before starting so raw game does not share its preparation space.
Gather tools and prepare to start
Gather a sharp knife, a suitable board and access to handwashing before bringing the pheasant to the work area. A sharp blade allows controlled cutting if needed, while a board gives the bird a stable surface; choose one that can be cleaned after use.
Wash your hands before handling the bird, and begin with clean tools. Put the knife and board within easy reach rather than searching for them once the pheasant is on the work surface. Keep the blade positioned safely on the board when it is not in use, and avoid placing it among feathers or other waste.
Check that the board sits securely on the washable surface and that there is room to move the bird without knocking over the clean container. Make sure handwashing facilities are accessible throughout the preparation, not blocked by equipment or waste. If a tool is visibly dirty before you start, clean it before it comes into contact with the pheasant.
This simple arrangement supports a step-by-step preparation: clean hands, clean tools and a clear working space are ready before the bird is handled. Keep the knife and board for the raw game task, then clean them when the work is finished.
Pluck the feathers
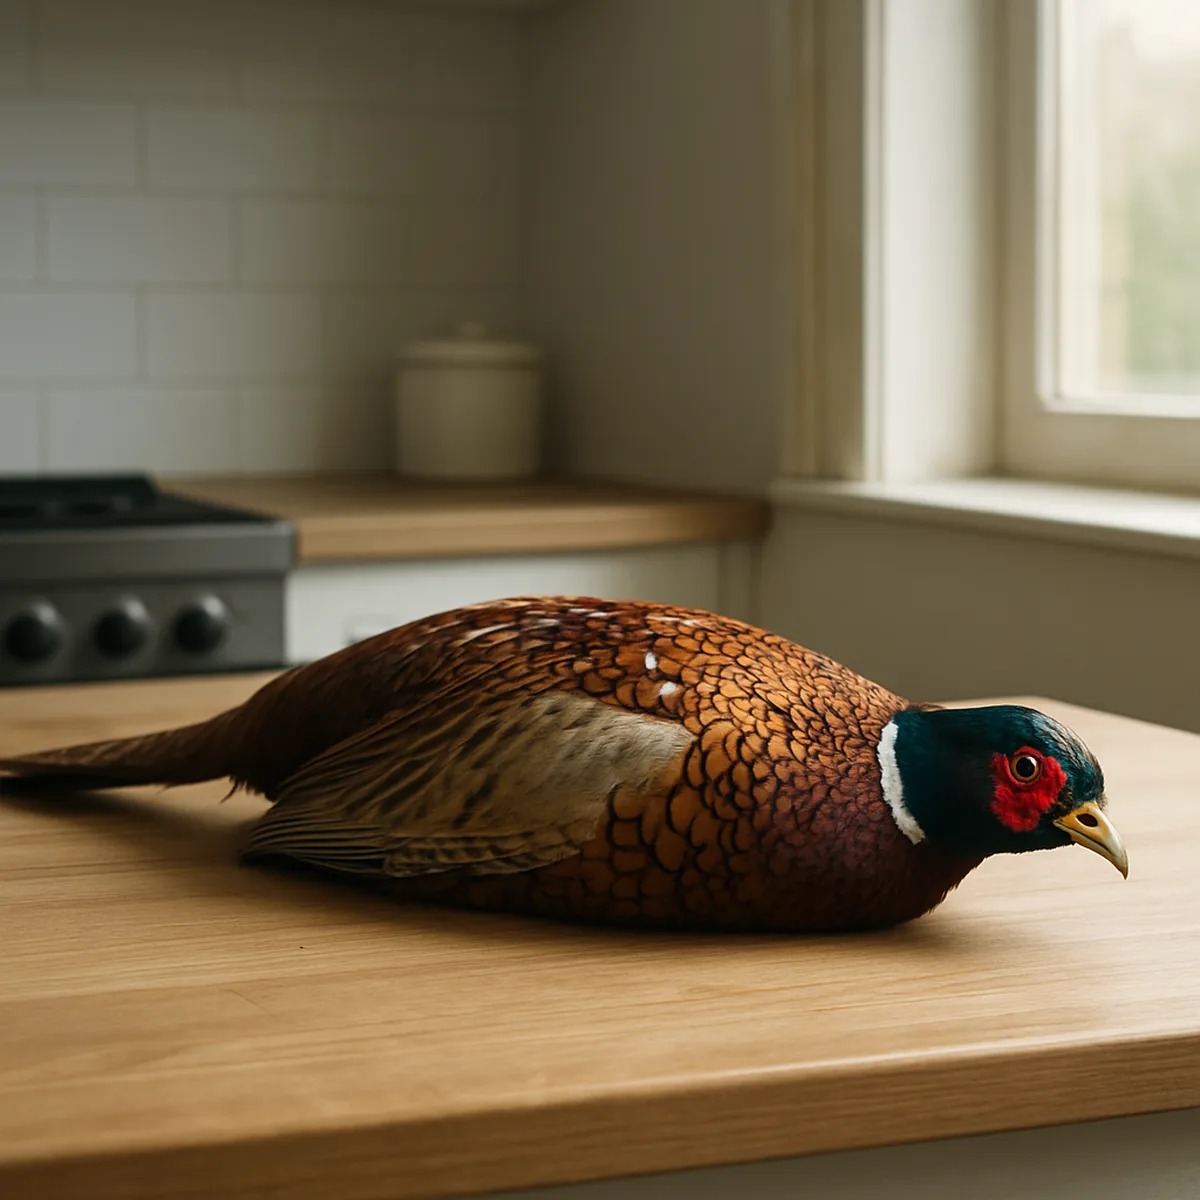
Plucking removes the feathers from the bird before further preparation. Work methodically over the breast, sides, back and remaining feathered areas rather than trying to clear a large patch at once. The aim is to lift each feather cleanly while keeping the skin supported. A steady pace makes it easier to see where feathers remain and to correct your grip before the skin is damaged.
Remove feathers in small sections
For controlled pheasant feather removal, clear one small patch at a time and follow the direction in which the feathers lie wherever practical. Keep the bird steady and change your grip as you move across its body.
- Begin on the breast, where the feathering is easy to reach; take a small pinch of feathers close to their bases rather than grabbing a broad handful.
- Draw the feathers away with a short, controlled pull in the direction of growth, keeping your free hand against the skin to steady the patch.
- Move across the breast in adjoining patches, then work over the sides and back; check each cleared area before shifting to the next one.
- Turn the bird as needed to reach the thighs and other feathered areas, supporting the skin beneath each patch instead of pulling from a distance.
- Leave the more resistant wing and tail feathers until last, taking only a few at a time and easing them out without a sharp jerk.
Keep the cleared and uncleared areas distinct as you work, so you can see your progress and avoid repeatedly tugging at the same patch. If a feather does not release with a light, steady pull, reduce the handful and adjust your grip rather than increasing force.
Protect the skin while plucking
Small handfuls help keep the force on individual feathers instead of spreading it across a larger area of skin. Take only a few feathers between your fingers, grip near their bases, and use gentle, even pressure. With your other hand, support the skin immediately beside or beneath the patch and hold it lightly taut as you pull.
Careful plucking is a short, controlled movement; forceful pulling uses a large handful or a sudden jerk and can stretch or split the skin. Do not pull hard against a feather that is tightly held. Reduce the number of feathers in your grip, reposition your supporting fingers, and try a slower pull aligned with the feather growth.
Pause as soon as the skin begins to split. Do not continue tugging at that spot or widen the tear by pulling nearby feathers with the same grip. Let the skin rest while you reassess the patch and use a gentler approach on the surrounding feathers. Patient, supported pulls are more reliable than speed when keeping the skin intact.
Check for remaining feathers
After the main pass, look over the bird under good light and run your fingertips lightly across the skin. Sight can reveal obvious feathers; touch helps find short stubs and fine pinfeathers that lie flat against the surface.
Remove a missed feather with your fingers, or use clean tweezers for a small, stubborn one. Take single feathers or a very small group, grip close to the skin and pull steadily rather than scraping or pinching the surrounding area. Recheck the breast, back, thighs, under the wings, around the legs and at the tail base, where feathered patches or folds can hide strays. Repeat the visual and fingertip check until no loose feathers remain; avoid pulling at skin to reach a feather you cannot grip safely.
Dress and inspect the bird
Dressing opens the body cavity so the entrails can be removed without damaging the surrounding meat. A careful sequence helps keep the crop, bowel and other organs intact during removal. Inspection is part of preparing a bird for food: check both the cavity and the pheasant’s overall condition. Use what you find to decide whether to continue or stop.
Open and dress the bird carefully
For a controlled opening, keep the breast facing up and expose only the area being cut; a shallow incision gives more control than a deep pass. The vent, bowel, crop and liver need separate attention because a blade or hard pull can release their contents into the cavity.
Work in this order, adjusting the opening only when the anatomy or carcass position requires it:
- Position the pheasant breast-up and locate the vent beneath the tail; steady the carcass so the skin does not shift under the blade.
- Make a shallow circular cut around the vent, separating skin and connective tissue while keeping the blade edge away from the bowel.
- Continue a short, controlled opening forward along the abdomen toward the breastbone; use your fingertips to lift the abdominal wall clear of the organs.
- Free the intestine and attached organs gently, drawing them out as a group without jerking; stop if resistance suggests tissue remains attached.
- At the base of the neck, loosen the crop and oesophagus; use the body opening if accessible, or make a small neck opening rather than forcing them through.
- Keep the liver and other organs intact while freeing them; take particular care not to crush the green gall bladder or spill its contents.
Do not tear attached tissue to save time. Once the entrails are out, the exposed cavity is easier to assess for damage or contamination.
Inspect the bird and cavity
Inspect the cavity, the removed organs and the pheasant’s exterior before deciding whether it is suitable to keep preparing. A typical finding is not proof of safety, so treat unexplained damage or contamination seriously.
| Observation | Typical finding or concern | Appropriate next step |
|---|---|---|
| Cavity after removal | Intact cavity with no visible bowel contents; small blood traces may remain at cut surfaces. | Continue checking the whole cavity and carcass; this finding alone does not confirm suitability. |
| Shot site | Local bruising or damaged tissue confined to one area. | Assess the surrounding meat and cavity for fragments or contamination; do not overlook damage beyond the entry point. |
| Ruptured crop or bowel | Feed or intestinal contents have reached the cavity or other meat. | If the spread is extensive or cannot be assessed confidently, stop and seek current official food-safety advice. |
| Odour or surface appearance | Strong sour or putrid odour, unusual slime, or marked discoloration. | Do not rely on rinsing or trimming to resolve an unexplained change; stop preparation and seek advice. |
| Overall condition | Multiple fractures, extensive bruising, swelling or unexplained lesions. | Stop if the cause or extent is unclear, rather than treating the bird as ordinary preparation damage. |
Compare the findings across the whole bird: a clean-looking cavity does not cancel out concerning damage elsewhere. Odour and appearance are warning signs, not a reliable test that meat is safe.
Know when to stop
Stop dressing the pheasant if it has an unexplained strong odour, abnormal appearance, extensive damage, or contamination that cannot be confidently assessed or managed. Do not continue by simply cutting away an uncertain area or rinsing the cavity; those steps cannot establish that the rest of the bird is suitable. If a crop or bowel has ruptured, consider how far its contents spread and whether the affected area can be clearly identified. When in doubt, keep the bird separate from food being prepared and seek current advice from the UK Food Standards Agency or your local authority’s environmental health team. Their current official food-safety guidance can help you decide what to do; no visual inspection alone guarantees suitability.
Hygiene and common handling errors
Treat pheasant and its juices as raw food throughout handling, because contamination can transfer from hands, boards and utensils. Keep raw game physically separate from food that will be eaten without further cooking. Clean and disinfect work surfaces and equipment after contact, following product instructions. Contain feathers and entrails promptly, and deal with spills before they spread. Follow current official UK food-safety guidance, including advice from the Food Standards Agency, when handling raw game.
Keep raw game separate
Treat the bird and its juices as raw food throughout handling; contamination can transfer from hands, boards and utensils to foods eaten without further cooking. Set up separate equipment before placing the pheasant on the work surface.
- Wash hands with soap and warm running water before handling the bird, after touching it, and whenever you switch from raw pheasant to another task.
- Use a dedicated, washable board for raw pheasant; keep it apart from boards used for bread, salad, cooked food or other ready-to-eat ingredients.
- Keep raw pheasant, its juices and contaminated packaging in a tray, separate from uncovered foods and prepared dishes, to contain drips during handling.
- Use separate knives, tongs and bowls for raw game and ready-to-eat food; do not reuse them until they have been washed thoroughly.
- Wash boards, knives, worktops and sink surfaces with hot soapy water after contact, then apply a food-safe disinfectant according to its label.
- Replace or launder cloths that have absorbed raw juices; use disposable paper towels for small spills rather than wiping contamination across the worktop.
Clean first to remove visible residue, then disinfect surfaces for the contact time stated on the product label. Keep clean equipment and ready-to-eat ingredients away from the area until it is ready for use.
Dispose of waste and correct mistakes
Collect feathers, entrails and other preparation waste as it is produced, placing it in a sturdy, leak-resistant bag or lidded container. Seal the container before moving it away from the work area, and follow local waste-collection instructions. Do not leave waste or contaminated packaging on the worktop, where it can spread juices or attract pests. For a spill, pick up solid material with disposable paper towels, then wash the affected surface with hot soapy water and disinfect it according to the product label. Wash your hands after handling the towels, waste or contaminated equipment. If raw pheasant or its juices touch ready-to-eat food, do not serve the affected food. If raw-game residue reaches another surface or utensil, stop using it and clean and disinfect it before reuse. Follow current UK Food Standards Agency guidance for any accidental contact and for handling raw game safely.
What to do after preparation
Once the bird is dressed, the next steps are safe storage and a cooking method suited to your plans. Follow current official food-safety guidance for handling prepared game, including advice on chilling, refrigeration, freezing and thawing. The Food Standards Agency provides current UK guidance; check it rather than relying on a fixed storage period. When you are ready to cook, use method-specific instructions for the cut and preparation you have chosen.
Follow suitable storage guidance
After dressing, handle and store the pheasant in line with current official food-safety guidance. The right approach depends on the bird’s condition, how it has been handled and whether you plan to refrigerate or freeze it, so avoid relying on a storage time taken out of context.
Consult the latest Food Standards Agency advice for guidance on chilling, refrigeration, freezing and thawing. Follow any relevant date or storage instructions supplied with the bird, and keep the meat protected from contamination while it awaits cooking. If you are freezing it, use guidance that covers suitable packaging and safe thawing as well as storage.
Do not treat a general rule of thumb as a substitute for current official advice: recommended conditions can depend on the circumstances. These steps help you decide how to manage the prepared bird before cooking without assuming that every pheasant has the same storage history. For safe storage of freshly dressed pheasant, use the current guidance that matches your situation.
Choose an appropriate cooking method
Choose a cooking method according to the recipe and the part of the bird you intend to use. A whole pheasant and separated portions may call for different approaches, and instructions for roasting should not automatically be applied to another method.
For practical, method-specific directions, consult the separate pheasant cooking guide before you begin. Follow its guidance for preparation, cooking and checking that the dish is ready, rather than estimating from instructions written for a different cut or technique. This gives you a clear next step after dressing the bird and helps match the cooking process to your chosen recipe.
Hygiene, common handling errors and what to do after preparation
A careful finish helps keep the prepared bird and surrounding work area under control. Small corrections during handling can prevent avoidable damage or contamination. Before putting equipment away, check that waste is contained and surfaces are clean. Then move on to current storage and cooking guidance for game birds.
Check for handling errors
Pulling hard at stubborn feathers can tear the skin. Ease the pressure, work on a smaller patch and use short, controlled movements instead of forcing the feather out. If raw contents spill, pause and keep the affected bird and tools away from clean items; remove visible contamination and clean the contact area before continuing.
An unclean board or counter can transfer residue back to the bird. Move the work to a clean, washable surface and clean and sanitise the original area according to the product label. Raw pheasant should not share a plate, utensil or preparation space with ready-to-eat food. Set aside dedicated equipment for the bird, and replace anything that has touched raw contents before handling food that will be eaten without further cooking.
Finish with a clean handover
Contain feathers and other preparation waste in a bag or suitable covered container, then dispose of it in line with local requirements. Clear the work area of loose debris and wash used tools, boards and contact surfaces; apply a food-safe sanitiser as directed on its label. Wash your hands before handling clean containers or other food.
Transfer the dressed pheasant to suitable storage and consult current food-safety guidance for handling and storage, rather than leaving the bird with the preparation waste. Choose a cooking method that suits the bird and follow reliable, up-to-date cooking guidance. A contained waste bag, clean worktop and prompt move to appropriate storage make a practical finish.